Why Social Clicks Fail on Landing Pages
Social clicks fail when landing pages break the promise—fix offer match, mobile speed, buying flow, and trust signals to recover conversions.

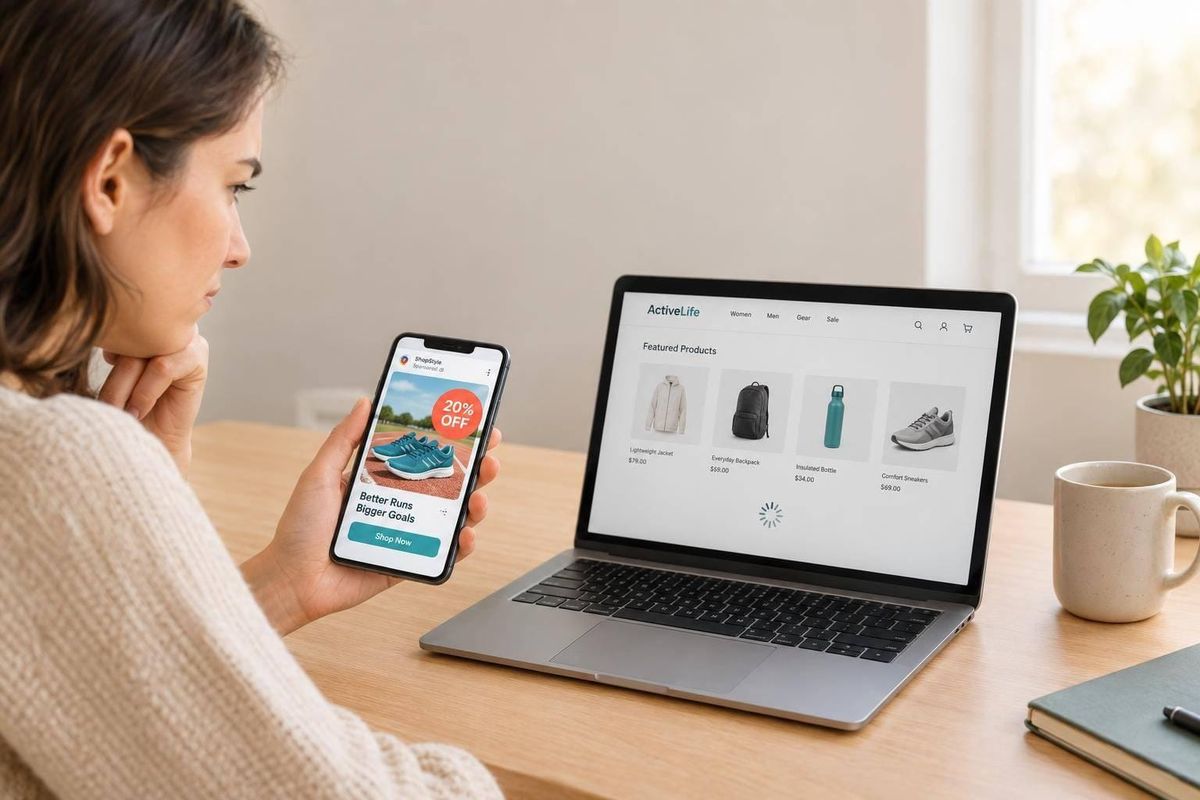
Before I blame social traffic, I check four things: the offer, mobile speed, buying controls, and proof that helps shoppers buy. Start by comparing your post with the first screen visitors see on their phones.
Here’s my checklist:
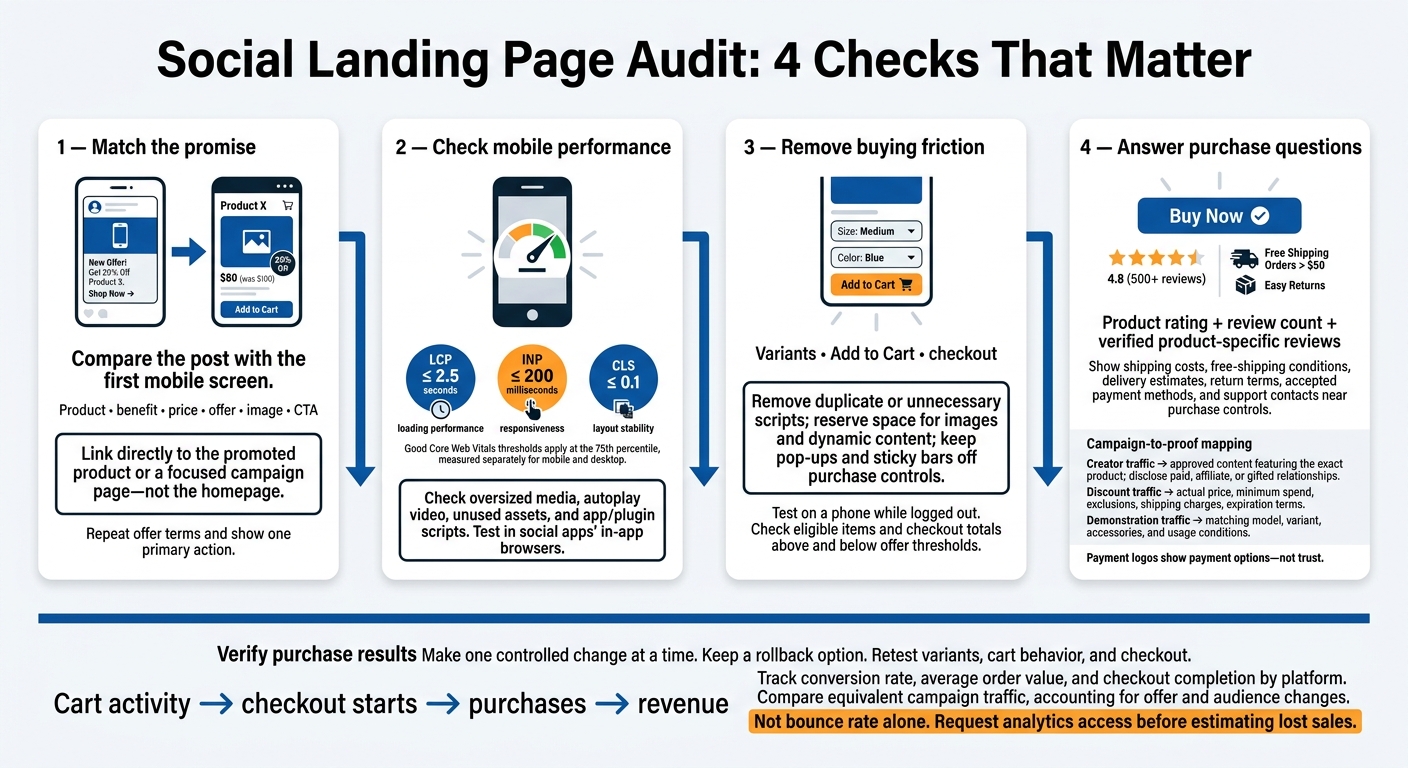
- Match the promise. Show the same product, price, discount, and next step as the post.
- Check mobile performance. Aim for the main content to load within 2.5 seconds, and test the page in social apps.
- Remove buying friction. Make sure variants, Add to Cart, and checkout work without pop-ups blocking them.
- Answer purchase questions. Put reviews, shipping costs, delivery estimates, and return terms near the purchase button.
I judge results by cart activity, checkout starts, purchases, and revenue - <u>not bounce rate alone</u>. For Shopify and WooCommerce outreach, I use StoreCensus to find Shopify brand prospect lists to review, then verify one page issue before contacting the merchant. I request analytics access before estimating lost sales.
Social Landing Page Audit: 4 Checks That Matter
How I Optimized a Landing Page for Higher Conversions in 5 Simple Steps
sbb-itb-61169e3
Match the Landing Page to the Social Post
Don’t send social traffic to a homepage. Link directly to the promoted product or a campaign page that repeats the offer on the first screen. Once the funnel shows where visitors drop off, check the page they reach after clicking.
Compare the Post With the First Mobile Screen
Save the original post content and destination URL. Then compare the post with the first mobile screen: do the product, benefit, price, offer, image, and CTA match? Label the mismatch - product, price, offer, image, or CTA - and use the table below to pinpoint where the page breaks the post’s promise.
Audit scenarios:
Social promise Landing-page evidence Likely friction Recommended fix 20% off winter coats - ends Sunday Coat page shows regular pricing without offer terms The discount appears missing Display the offer near the price, state the exact deadline, and apply the discount automatically where possible Build a three-step acne-care routine Homepage leads with generic brand copy and unrelated categories Visitors must find and assemble the routine Create a focused page showing the three products, their sequence, and a Shop the routine button Free shipping on orders over $75 Collection page omits the threshold Visitors cannot confirm eligibility Show the $75 threshold beside the offer and explain how the cart qualifies
Make the Offer and Next Step Clear
Use a focused Shopify or WooCommerce template that shows the product, matching image, main benefit, price, offer terms, and one primary action. Make variants easy to select and inventory status easy to check.
For a single-item campaign, use an existing product page. Build a dedicated page for a creator bundle, a distinct audience, or an offer that the standard template can’t explain clearly.
Test the link on a phone while logged out. Check variants, eligible items, and checkout totals both above and below any threshold. Confirm exclusions and whether offers can be combined.
Fix Mobile Loading and Theme Problems
Once the post and page match, check how the page works on mobile. If the offer fits the post but clicks still don’t convert, look at loading speed, browser behavior, and theme code.
Check Media, Scripts, and Layout Shifts
Measure load speed, tap responsiveness, and layout stability. Google’s Core Web Vitals guidance defines good performance as Largest Contentful Paint (LCP) at or below 2.5 seconds, Interaction to Next Paint (INP) at or below 200 milliseconds, and Cumulative Layout Shift (CLS) at or below 0.1. These thresholds apply at the 75th percentile, measured separately for mobile and desktop.[1][2]
Don’t stop at total load time. Check oversized images, autoplay video, unused theme assets, and app or plugin scripts.
Use Lighthouse or WebPageTest to reproduce problems. Then check actual visitor experiences with real-user monitoring and Chrome User Experience Report data, where available. Record device and network conditions, along with when the offer appears above the fold. Test in-app browsers, too: they can handle redirects and checkout differently.
Simplify Shopify and WooCommerce Mobile Templates
Check the theme’s code and scripts. Remove duplicate or unnecessary scripts, test touch targets, and make sure pop-ups or sticky bars don’t cover variant selectors or purchase controls.
Use this table to pinpoint problems with media, JavaScript, layout shifts, or overlays.
| Social-click failure | Likely technical cause | Mobile test | Implementation fix |
|---|---|---|---|
| Product image appears late | Oversized media or incorrect image priority | Identify the LCP element on a slowed connection | Resize and compress media; use responsive images; don’t lazy-load the above-the-fold LCP image |
| Variant or add-to-cart taps stall | Heavy JavaScript or duplicate app/plugin code | Record taps and inspect long main-thread tasks | Remove duplicate code; defer scripts not needed for the purchase action |
| Price or button shifts | Images, banners, or widgets lack reserved space | Record loading and watch the purchase area | Set image dimensions or aspect ratios; reserve space for dynamic content |
| Purchase controls are covered | Pop-ups or overlapping sticky bars | Open the page in an in-app browser and try closing overlays | Reduce obstructive pop-ups; adjust sticky bars; keep close controls reachable |
Make one controlled change at a time, and keep a way to roll it back. After each change, retest variant selection, cart behavior, and checkout. Compare add-to-cart, checkout-start, and purchase rates using equivalent campaign traffic, accounting for changes to the offer and audience.
If the page works well on mobile, check trust signals near the purchase button next.
Place Trust Signals Near the Purchase Button
Once speed and layout are fixed, trust is the last barrier to purchase. Visitors from social media may know the product but not the merchant. Help them feel ready to buy with reviews, delivery estimates, return details, payment options, and support contacts.
Show Reviews, Shipping, and Returns Near Add-to-Cart
Place the product’s rating, review count, and link to verified product-specific reviews near its benefits or price. Put feedback that answers campaign-specific concerns - such as fit, compatibility, or durability - first.
Below the purchase controls, show:
- Prices in U.S. dollars, shipping costs, free-shipping conditions, shipping limits, estimated delivery dates, and whether taxes apply at checkout.
- Return windows, required item condition, refund methods, fees, who pays for return shipping, and a link to the full policy. Include accepted payment methods and support contacts here, too.
Match this information to the traffic source so shoppers see proof that answers their doubts.
Match the Proof to the Campaign
For creator traffic, use approved creator content featuring the exact product. Name the creator and disclose paid, affiliate, or gifted relationships.
For discount traffic, state the actual price, minimum spend, exclusions, shipping charges, and expiration terms.
For demonstration traffic, match the model, variant, accessories, and usage conditions shown in the post. Don’t use praise for unrelated products.
Reject fake stock warnings, countdowns that reset, testimonials without attribution, and security claims you can’t support. Payment logos show payment options - not trust.
The FTC’s Consumer Reviews and Testimonials Rule took effect on October 21, 2024, addressing deceptive review practices[3]. Check claims against the merchant’s review records, promotion rules, fulfillment settings, and policies.
Conclusion: Build a Focused Landing-Page Audit
Audit the four failure points that kill social clicks: offer mismatch, slow mobile loading, theme friction, and missing trust signals. Build a package of fixes around verified problems - not a redesign based on bounce rate alone.
Use this checklist to decide which pages need attention first.
Prioritize Fixes and Track Purchase Results
Start with high-volume campaign pages where social referrals perform poorly in the purchase funnel. Compare the post with its mobile destination, test load times, and check whether the page gives shoppers enough reassurance to buy. Use those findings to define the Shopify or WooCommerce project scope.
Track conversion rate, average order value, and checkout completion by platform. Compare native checkout completion with mobile site checkout completion to locate friction.
Once you’ve verified the issue, use the audit to build a qualified lead list.
Qualify Audit Leads With StoreCensus
Use StoreCensus to filter Shopify and WooCommerce merchants by U.S. location, revenue tier, theme, tech stack, growth signals, and decision-maker contact information.[4] Before contacting a decision-maker, manually check the merchant’s campaign destination and how the page works on mobile.
Lead with one verified issue, backed by the affected URL and a mobile check. Request analytics access before estimating lost revenue. Public storefront evidence can show friction, but it doesn’t reveal bounce or conversion rates.[4]
FAQs
How can I distinguish poor traffic from landing-page problems?
Compare conversion rates and engagement by traffic source. If conversions are low across all channels and your store takes more than 2.5 seconds to load or is hard to navigate, the problem likely lies with the store. If paid social performs much worse than organic or direct traffic, poor-quality traffic is the likely cause.
Bounce rates above 65% and sessions under 30 seconds are further signs that your landing page content doesn’t match what visitors expect.
Which landing-page fix should I prioritize first?
Start with technical performance. Load times over 2.5 seconds can look like design problems and lead to high bounce rates. Before reworking the user experience or changing design elements, bring Largest Contentful Paint (LCP) below 2.5 seconds by optimizing images and removing unused apps.
Once speed is sorted, build trust by placing user-generated content galleries and reviews above the fold. These help reduce friction as shoppers decide whether to buy.
How much traffic do I need to validate a fix?
You need enough traffic to tell a statistically significant performance change from random noise. Before testing, check that Meta’s Event Match Quality (EMQ) is at least 6.0 and that server-side tracking through CAPI is in place to recover lost conversion data.
Run an A/B test with a control and a variant. Use product page conversion rate as your primary metric, and look for consistent patterns across traffic rather than isolated numbers.