AR for Ecommerce: Best Practices
AR best practices for product pages: pick fit-sensitive items, place clear AR buttons, optimize GLB/USDZ under 5MB, test devices, and track results.

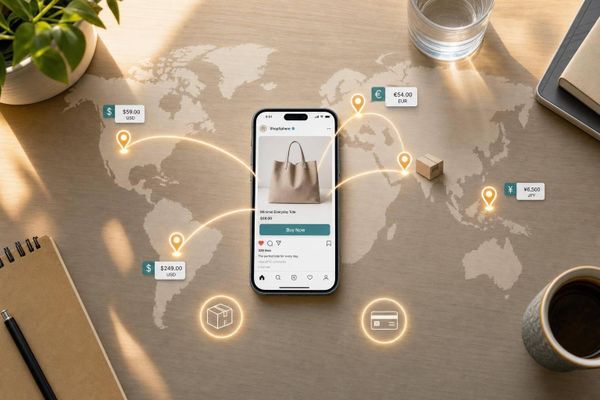
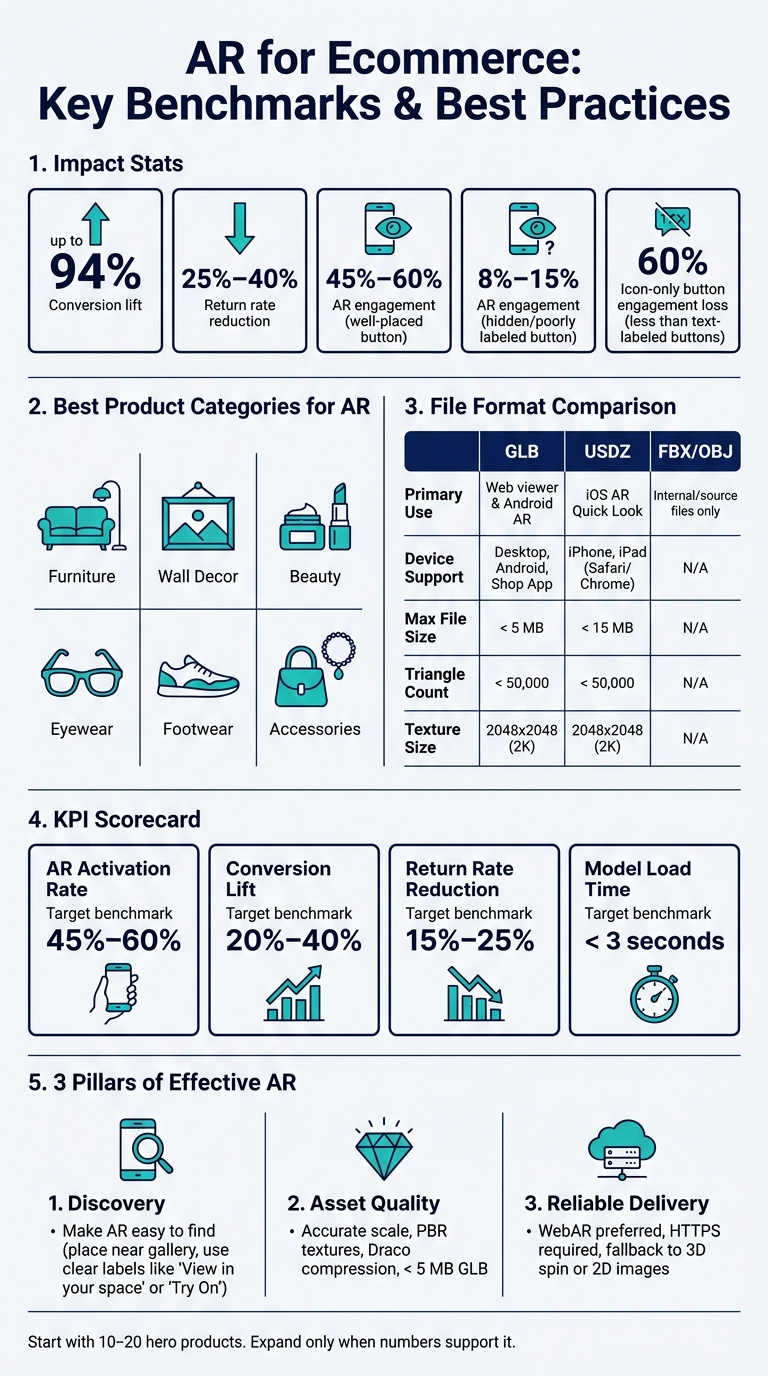
AR should earn its spot on the product page. If it helps shoppers answer “Will this fit?” or “Will this look right on me?”, it can lift conversion by up to 94% and cut returns by 25% to 40%.
Here’s the short version: I’d use AR first on products with visual doubt, like furniture, wall decor, beauty, eyewear, footwear, and accessories. Then I’d make the AR button easy to spot, keep 3D files light for mobile, support GLB and USDZ, test on iPhone and Android, and track add-to-cart, conversion, returns, and load time.
If I were planning AR for Shopify or WooCommerce, I’d focus on these points first:
- Start with the right products: expensive items, fit-sensitive items, and products with more returns
- Put AR near the main gallery: not buried in tabs or accordions
- Use plain labels: “View in your space” or “Try On”
- Keep models accurate: correct size, color, and finish
- Keep files small: target under 5 MB for GLB and under 50,000 triangles
- Support the main formats: GLB for web/Android and USDZ for iPhone/iPad
- Have a fallback: 3D viewer first, then 2D images or video
- Measure business results: activation rate, conversion lift, return rate drop, and model load under 3 seconds
AR for Ecommerce: Key Benchmarks, Formats & Best Practices at a Glance
Successful Augmented Reality in e-commerce
sbb-itb-61169e3
Quick comparison
| Area | What I’d do |
|---|---|
| Best product types | Furniture, decor, beauty, eyewear, footwear, accessories |
| Main goal | Cut returns and help more shoppers buy |
| AR placement | Near gallery, size picker, or main product media |
| Button text | View in your space / Try On |
| File formats | GLB for web/Android, USDZ for iOS |
| Performance target | < 5 MB GLB, < 3-second load |
| Store setup | Shopify native support; WooCommerce via plugin or <model-viewer> |
| Success metrics | AR use, add-to-cart after AR, conversion, returns |
Bottom line: I wouldn’t treat AR like a gimmick. I’d treat it like a buying tool that needs the right products, clean setup, and hard numbers behind it.
Make AR easy to find and easy to use
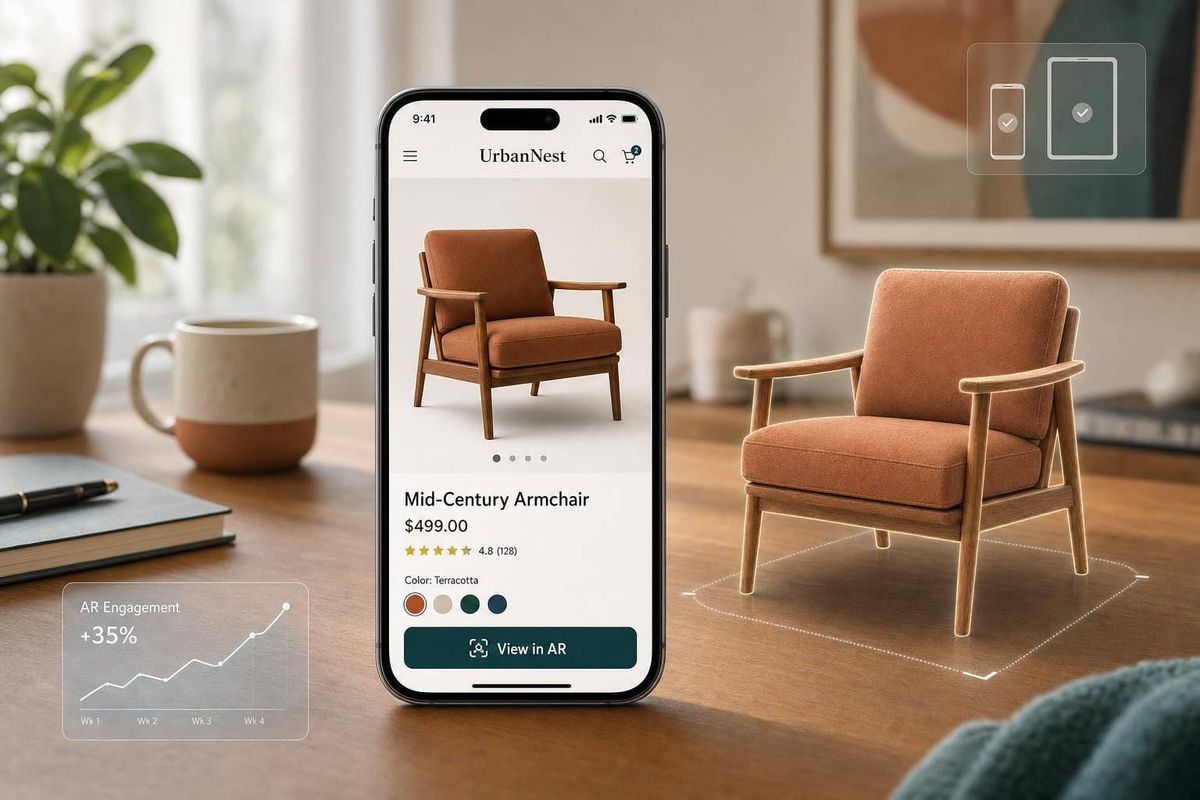
A great 3D model won't do much if shoppers never see the AR button. When AR is placed well, engagement can reach 45–60%. When the button is tucked away or labeled poorly, it usually stays under 25%.
Place the AR entry point near product media
Placement comes first because people use what they can spot fast. The AR button should sit right next to the size selector or the main image gallery. It shouldn't be buried in a description accordion, a FAQ tab, or some other secondary block.
On mobile, put it within the first 600 pixels of the page. Hidden buttons inside expandable sections often end up with engagement rates of only 8–15%.
Desktop shoppers need a simple path too. A QR handoff lets them move to mobile without friction. On collection pages, add a small "TRY ON" badge to cards that support AR.
Use clear labels and mobile-first guidance
The label should say exactly what the shopper can do. Use "View in your space" for furniture and decor. Use "Try On" for footwear, apparel, and eyewear. Skip vague labels like "AR" or stiff brand language.
Icon-only buttons tend to underperform. They give up about 60% of possible engagement compared with buttons that use clear text labels. A short line of micro-copy can help too, such as "Use your camera - no app download". That small bit of guidance can ease hesitation.
After launch, give shoppers a few short prompts:
- Allow camera access
- Find a surface
- Place the product
Keep product details available inside AR
Don't make shoppers choose between viewing the item and checking the details. Keep dimensions, the selected variant, and the price visible inside AR. Use an overlay so that when they close AR, they land back on the product page with add to cart still in view.
If the store offers multiple colors or materials, the AR model should update as shoppers switch variants. They shouldn't have to restart the whole experience each time.
Once AR is simple to launch and easy to use, asset quality becomes the next limit.
Build accurate 3D assets for ecommerce
After placement and usability, asset quality is what makes shoppers trust AR enough to try it.
Model accuracy, scale, and texture quality
Accuracy builds trust. If the proportions are off, the lighting looks fake, or a color variant doesn’t match, AR can hurt confidence more than having no AR at all.
Build every model at 1:1 real-world scale using exact dimensions, so the product looks true to size when someone places it in a room. Use quad-based geometry with beveled edges, which helps surfaces look smooth instead of harsh or fake. The mesh should also be watertight. If it has gaps, those can show up as visible holes in AR.
For materials, use PBR textures with base color, normal, and ORM maps so the model reacts to light in a natural way. Small surface details matter here. A bit of grain, light scuffing, or fine scratches can make the model feel much closer to the physical product. Before you publish, compare the rendered model side by side with the real item. If the silhouette doesn’t match the product people receive, shopper trust drops fast.
Optimize files for mobile performance
Even an accurate model can fall flat if it loads too slowly on mobile. Keep models under 5 MB to avoid slow mobile loads.
Triangle count matters too. For most products, stay under 50,000 triangles. That’s the safer target for broad device support. Instead of modeling tiny details like stitching or scuffs, bake them into normal maps. It’s a simple tradeoff: you keep the look without making the file heavier.
Use 2048 x 2048 (2K) as the standard texture size. In most mobile cases, 4K textures add extra bandwidth without a clear visual payoff. Apply Draco mesh compression to GLB files as well. It can cut geometry size by 60–80% without visible loss in quality. And to protect page speed and Core Web Vitals, lazy-load the viewer and show the model only after the shopper interacts with it.
File formats for Shopify and WooCommerce

Use GLB for the web and Android. Use USDZ for iOS Quick Look.
| Format | Primary Use | Device Compatibility | Recommended Max Size |
|---|---|---|---|
| GLB | Web viewer & Android AR | Desktop, Android, Shop App | < 5 MB |
| USDZ | iOS AR Quick Look | iPhone, iPad (Safari/Chrome) | < 15 MB |
| FBX / OBJ | Working/source files | Internal use only | N/A |
Shopify stores support both GLB and USDZ natively, and <model-viewer> automatically serves the right format based on the visitor’s device. WooCommerce doesn’t handle this out of the box, so teams usually add Google’s <model-viewer> web component manually or use a third-party plugin to get the same behavior.
On either platform, keep the original working files with unapplied transforms. That makes future edits much easier and helps you avoid rebuilding the model from scratch.
With the asset pipeline in place, the next step is deciding how to deliver it across devices and storefronts.
Choose the right AR delivery method and storefront setup
WebAR vs. app-based AR
With the model ready, the next call is simple: how do shoppers open AR with as little friction as possible?
WebAR runs right in a mobile browser, so there’s no app download. A shopper taps "View in AR," the browser asks for camera permission, and they can place the product in their space. Native app AR needs an install first, which adds an extra step.
| Feature | WebAR (Browser-based) | App-based AR (Native) |
|---|---|---|
| Shopper Friction | Low (No download required) | High (Requires app install) |
| Implementation | Simple (JavaScript/HTML) | Complex (SDK integration) |
| Repeat Usage | Best for discovery and one-off visits | Best for loyalty and power users |
| Browser Support | iOS Safari, Android Chrome | Device OS dependent, not browser-based |
| Maintenance Overhead | Lower (Web standards) | Higher (OS and app store updates) |
For most product pages, WebAR is the default. App-based AR makes more sense for loyal users and more advanced tools.
Shopify and WooCommerce integration points
Once you pick the delivery method, tie it to the storefront’s built-in AR path by analyzing how other brands implement these features. The best setup puts AR one tap from the product gallery and fails gracefully when a device can’t run it.
On top Shopify stores, AR sits inside the product media gallery. Upload both GLB and USDZ files right to the product, and the model_viewer_tag Liquid filter handles rendering inside any Online Store 2.0 theme.
WooCommerce doesn’t offer that same native path. Most teams use third-party plugins or embed a WebAR viewer straight into product templates.
Device testing, permissions, and fallback states
Before you launch AR on any product, test on real iOS and Android devices over mobile data - not just office Wi-Fi. That part matters. Testing on 4G or 5G shows what load times look like for actual shoppers.
The key device targets are:
- iOS Safari for USDZ
- Android Chrome for GLB
Check device support before you show the AR button.
The storefront must run over HTTPS. Mobile browsers won’t grant camera access on insecure connections. Use permission copy like "View in your space" so shoppers know why the camera is needed.
Fallback states need just as much attention as the AR experience itself. If a device doesn’t support AR, fall back to an interactive 3D spin viewer. If 3D isn’t supported either, show high-quality 2D images or video. If AR is unsupported, show a clear fallback.
Measure results and decide where to expand AR
Track usage, engagement, and conversion impact
Once AR is live across devices, the next step is simple: check whether it changes how people buy.
That means looking at revenue impact, return reduction, and load performance instead of views or novelty. If AR gets attention but doesn’t help shoppers move toward purchase, it’s just window dressing.
Set up analytics events like ar-session-start, ar-session-duration, model-load, and add-to-cart-after-ar so you can tie AR use to business results. Keep event tagging consistent across analytics, attribution, and testing so every team works from the same source of truth.
A good scorecard includes activation rate, load time, add-to-cart after AR, conversion, and returns.
| KPI | Target Benchmark | Action if Below Target |
|---|---|---|
| AR Activation Rate | 45%–60% | Improve button placement and labeling |
| Conversion Lift | 20%–40% | Audit asset accuracy and material realism |
| Return Rate Reduction | 15%–25% | Verify scale accuracy and variant logic |
| Model Load Time | < 3 seconds | Reduce polycount or compress textures |
When you compare performance, don’t use sitewide averages. That can muddy the picture fast. Compare AR users against a matched control group instead: products with similar price points, categories, and past return-rate baselines. Also break results out by device OS, because Android and iOS can behave very differently. Track device-specific failures and permission drop-off on their own.
Those results should guide where AR goes next.
Prioritize AR selectively across the catalog
AR tends to work best when you apply it with care, not everywhere at once. The strongest programs usually begin with 10 to 20 hero products and grow only when the numbers back it up.
Start with products that have:
- Higher price points
- Frequent size or fit returns
- Strong mobile traffic
The key idea is pretty straightforward: expand AR only when it removes a real purchase barrier.
Conclusion: The 3 pillars of effective AR in ecommerce
Effective AR in ecommerce rests on three pillars: discovery, asset quality, and reliable delivery. When shoppers can find AR, trust the model, and load it without friction, AR helps the buying process instead of feeling like a gimmick. Done well, AR reduces returns, builds confidence, and moves shoppers toward purchase.
FAQs
How much does ecommerce AR cost to launch?
Costs usually come from two areas: 3D asset creation and the deployment platform.
For the 3D assets themselves, AI-generated models usually cost $10 to $50 each. Professional modeling is pricier, often landing in the $50 to $300 range per unit.
Then there’s deployment. WebAR usually starts at about $140/month. A native mobile app, on the other hand, often calls for $50,000+.
That gap matters. If you want a lower-cost way to get started, WebAR is often the easier path. If you’re building a full app experience, the upfront spend is much higher.
Do shoppers need to download an app to use AR?
No. Shoppers usually don't need to download an app to use AR in ecommerce.
Most modern AR experiences run right in a mobile web browser through WebAR. That includes built-in browser options like Apple’s AR Quick Look and Google’s Scene Viewer.
Apps are still an option, though. They make sense for more specialized or premium use cases.
How do I know which products should get AR first?
Start with products where fit, scale, style, or placement have a big impact on whether someone buys. Keep the first rollout small and focused on high-consideration items like furniture, home decor, or large accessories. With these products, people often hesitate because they can’t picture how something will look in their actual space.
Don’t roll out AR across your entire catalog all at once. Instead, pick the products where visual accuracy is most likely to build trust, increase engagement, and cut returns. Then grow from there based on what the results show.